
前言
awvs是一个漏洞扫描工具,具体的介绍不再赘述,大家可以参考官网。这款软件安装需要付费,API也需要付费才可以查看。不过所幸awvs提供了docker版本,可以看下面的安装教程。然后根据经验提供了java和python api常见的操作。
安装
我们这里使用docker镜像。
docker pull secfa/docker-awvs
docker run -it -d -p 13443:3443 secfa/docker-awvs
在浏览器中访问 链接
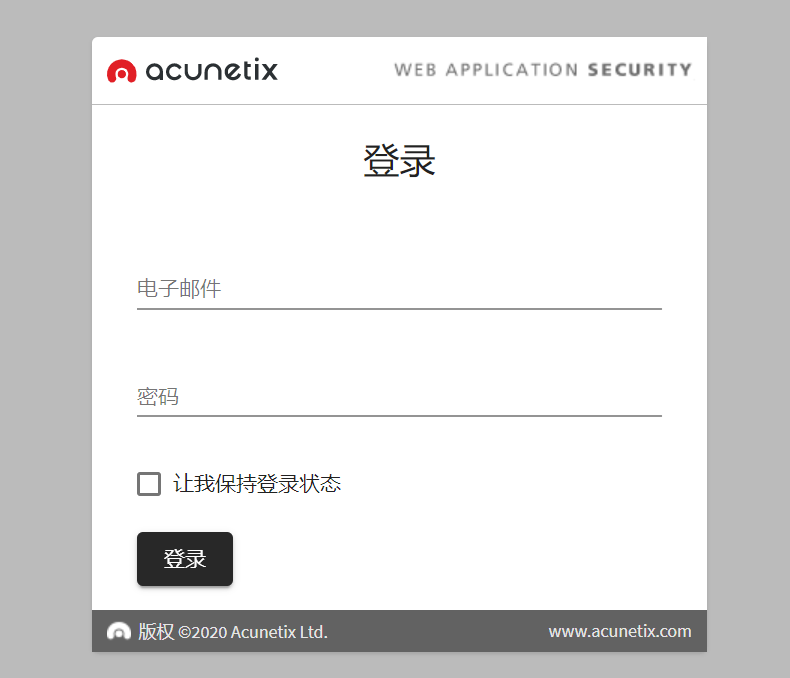
默认的用户名和密码如下所示,登陆之后,就可以进行操作了。
Username:admin@admin.com
password:Admin123
常用API
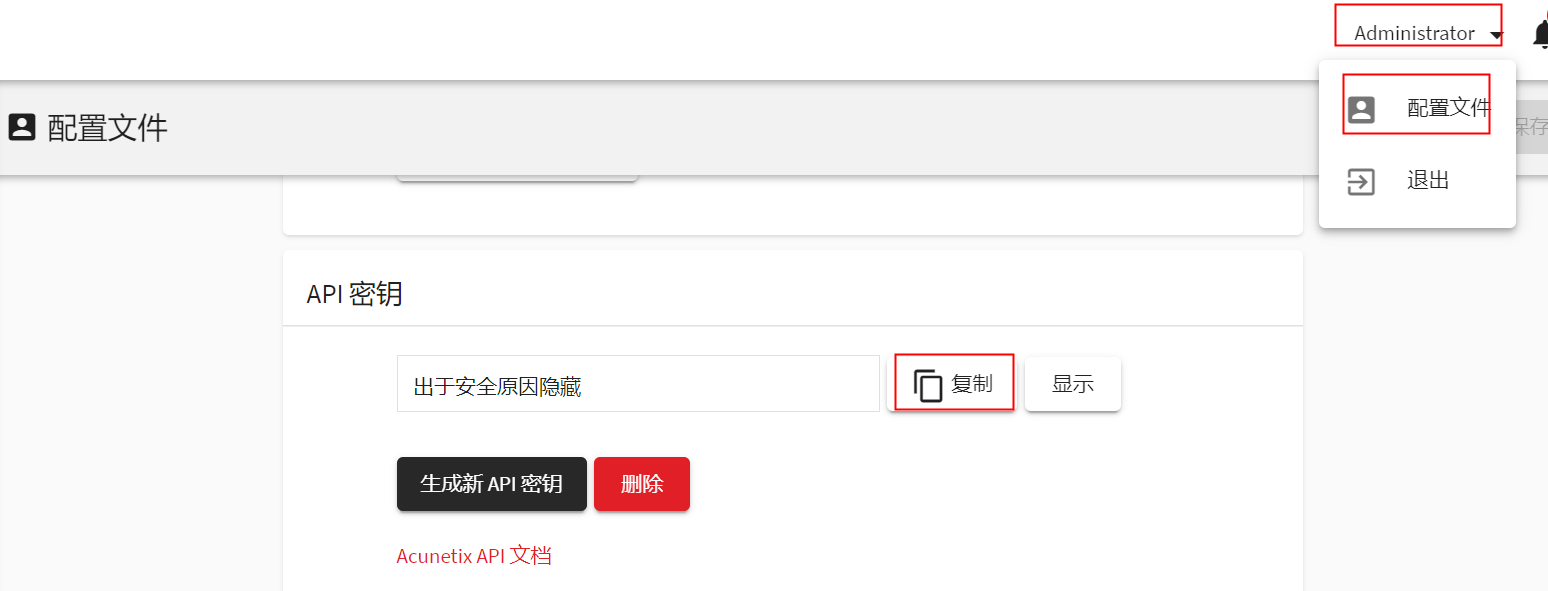
0. 获取API密钥
我们操作是需要进行认证的,所以第一步是获取相应的API密钥。
1. 添加扫描任务
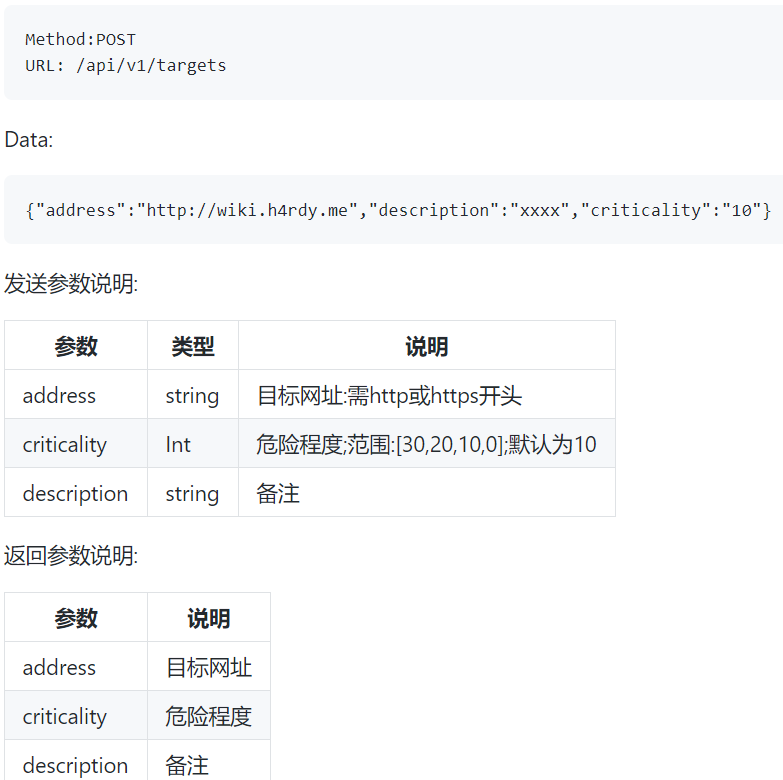
说明,awvs默认是需要证书的,我这里为了简单,就把https给忽略了,下同。
java
    @RequestMapping(value = "/addTarget", method = RequestMethod.GET)
    public String addTargetForWVS(String target) {
        log.debug("target:{}", target);
        RestTemplate restTemplate = new RestTemplate();
        HttpHeaders headers = new HttpHeaders();
        headers.add("X-Auth", apiKey);
        headers.add("Content-Type", "application/json;charset=UTF-8");
        JSONObject jsonObject = new JSONObject();
        jsonObject.put("address", target);
        jsonObject.put("description", "url");
        jsonObject.put("criticality", "10");
        HttpEntity<String> entity = new HttpEntity<String>(jsonObject.toString(), headers);
        String url = awvsUrl + "api/v1/targets";
        try {
            SslUtils.ignoreSsl();
        } catch (Exception e) {
            e.printStackTrace();
        }
        ResponseEntity<String> response = restTemplate.postForEntity(url, entity, String.class);
        log.debug("response:{}", response.getBody());

        if (response.getStatusCodeValue() == 201) {
            JSONObject resJson = new JSONObject(response.getBody());
            return resJson.getString("target_id");
        }
        return "error " + response.getStatusCodeValue();
    }
postman测试: 下面是python版本。
python
    def addTarget(self, target_url):
        info = {
            "address": target_url,
            "description": '',
            'criticality': "10"
        }
        info = json.dumps(info)
        ret = self.awvs.post(self.awvs_url + 'api/v1/targets', data=info, verify=False, headers=self.headers).text
        ret = json.loads(ret)
        return ret['target_id']
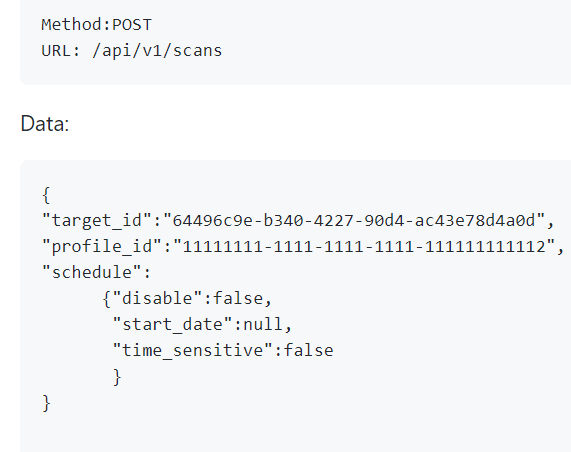
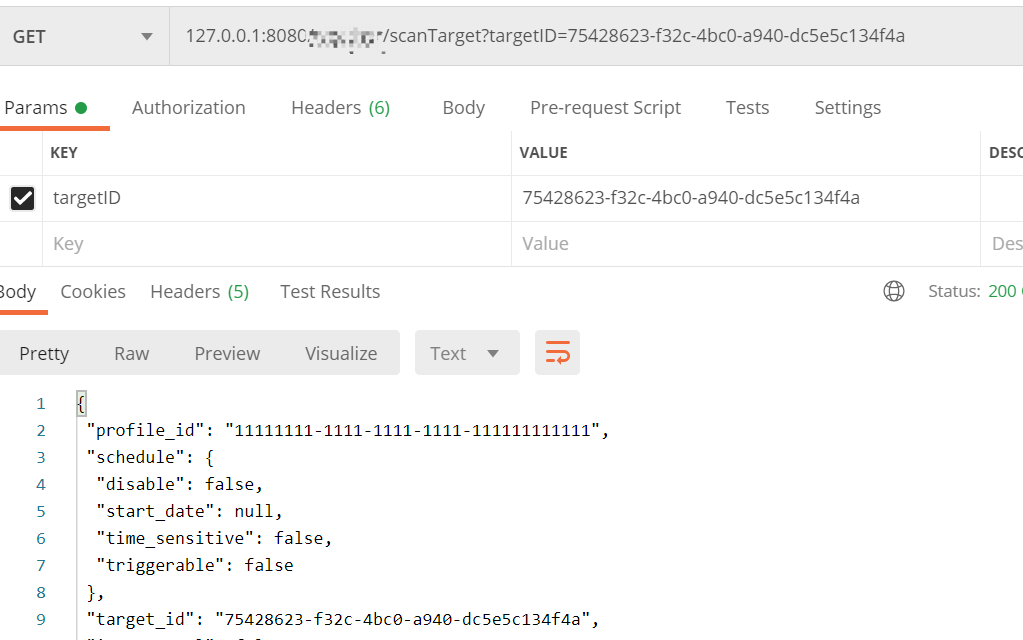
2. 扫描目标

java
    @RequestMapping(value = "/scanTarget", method = RequestMethod.GET)
    public String scanTargetForWVS(String targetID) {
        log.debug("target:{}", targetID);
        RestTemplate restTemplate = new RestTemplate();
        HttpHeaders headers = new HttpHeaders();
        headers.add("X-Auth", apiKey);
        headers.add("Content-Type", "application/json;charset=UTF-8");
        JSONObject jsonObject = new JSONObject();
        jsonObject.put("target_id", targetID);
        jsonObject.put("profile_id", "11111111-1111-1111-1111-111111111111");
        JSONObject jsonObject1 = new JSONObject();
        jsonObject1.put("disable", false);
        jsonObject1.put("start_date", JSONObject.NULL);
        jsonObject1.put("time_sensitive", false);
        jsonObject.put("schedule", jsonObject1);
        jsonObject.put("ui_session_id", "81ae275a0a97d1a09880801a533a0ff1");
        HttpEntity<String> entity = new HttpEntity<String>(jsonObject.toString(), headers);
        String url = awvsUrl + "api/v1/scans";
        try {
            SslUtils.ignoreSsl();
        } catch (Exception e) {
            e.printStackTrace();
        }
        ResponseEntity<String> response = restTemplate.postForEntity(url, entity, String.class);
        log.debug("response:{}", response.getBody());

        if (response.getStatusCodeValue() == 201) {
            return response.getBody();
        }
        return "error " + response.getStatusCodeValue();
    }
python
        def scanTarget(self, target_id):
        info = '{"target_id":"xxxxxxxxxxxx","profile_id":"11111111-1111-1111-1111-111111111111","schedule":{"disable":false,"start_date":null,"time_sensitive":false},"ui_session_id":"81ae275a0a97d1a09880801a533a0ff1"}'
        info = info.replace('xxxxxxxxxxxx', target_id)
        self.awvs.post(self.awvs_url + '/api/v1/scans', data=info, verify=False, headers=self.headers).text
3. 获取扫描结果
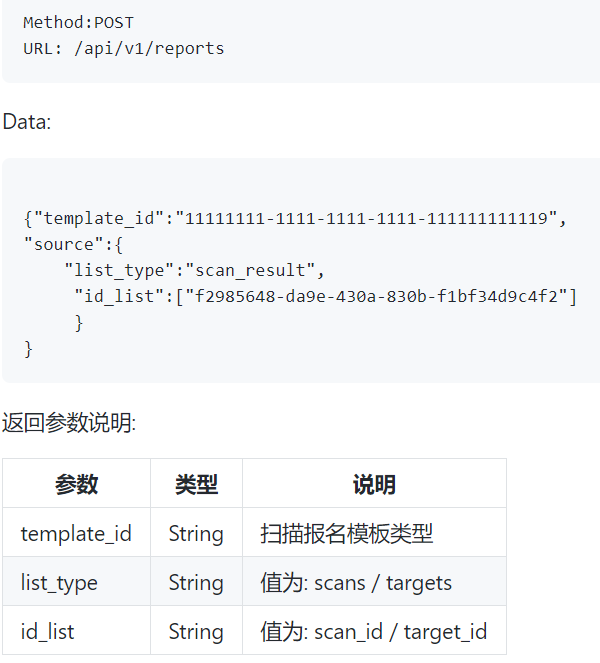
这一步不同于前两步,较为繁琐。我们首先需要根据targetID获取scanID,然后获取当前scanID的状态,注意这一步需要不断重试,如果已完成,则获取下载地址,包含html格式和pdf格式,调用接口下载html和pdf格式的扫描结果。
java
    @RequestMapping(value = "/reports", method = RequestMethod.GET)
    public String reportsForWVS(String targetID) {
        RestTemplate restTemplate = new RestTemplate();
        HttpHeaders headers = new HttpHeaders();
        headers.add("X-Auth", apiKey);
        headers.add("Content-Type", "application/json;charset=UTF-8");
        // 1. 获取scanID
        String getScanIDURL = awvsUrl + "api/v1/scans";
        //String url = awvsUrl + "api/v1/reports";
        try {
            SslUtils.ignoreSsl();
        } catch (Exception e) {
            e.printStackTrace();
        }
        HttpEntity<String> entity = new HttpEntity<String>(headers);
        ResponseEntity<String> response = restTemplate.exchange(getScanIDURL, HttpMethod.GET, entity, String.class);
        String scanID = "";
        String status = "";
        if (response.getStatusCodeValue() == 200) {
            JSONObject scanIDJsonObject = new JSONObject(response.getBody());
            JSONArray jsonArray = scanIDJsonObject.getJSONArray("scans");
            for (int i = 0; i < jsonArray.length(); ++i) {
                JSONObject scanRes = jsonArray.getJSONObject(i);
                if (scanRes.getString("target_id").equals(targetID)) {
                    scanID = scanRes.getString("scan_id");
                    break;
                }
            }
            // 2. 获取当前的状态
            while (!status.equals("completed")) {
                String getScanStatusURL = awvsUrl + "api/v1/scans/" + scanID;
                response = restTemplate.exchange(getScanStatusURL, HttpMethod.GET, entity, String.class);
                if (response.getStatusCodeValue() == 200) {
                    JSONObject jsonObject = new JSONObject(response.getBody());
                    status = jsonObject.getJSONObject("current_session").getString("status");
                } else {
                    return "error " + response.getStatusCodeValue();
                }
                try {
                    Thread.sleep(30);
                } catch (InterruptedException e) {
                    e.printStackTrace();
                }
            }
            // 3. 获取下载地址
            JSONObject dataReportJson = new JSONObject();
            dataReportJson.put("template_id", "11111111-1111-1111-1111-111111111111");
            JSONObject sourceJson = new JSONObject();
            sourceJson.put("list_type", "scans");
            sourceJson.put("id_list", new JSONArray().put(scanID));
            dataReportJson.put("source", sourceJson);
            HttpEntity<String> postEntity = new HttpEntity<String>(dataReportJson.toString(), headers);
            String reportsURL = awvsUrl + "api/v1/reports";
            response = restTemplate.exchange(reportsURL, HttpMethod.GET, postEntity, String.class);
            if (response.getStatusCodeValue() == 200) {
                // 4. 下载所需报告
                JSONObject jsonObject = new JSONObject(response.getBody());
                String download = jsonObject.getJSONArray("reports").getJSONObject(0).getJSONArray("download").getString(0);
                String reportsDownloadURL = awvsUrl + download;
                log.info("reportsDownloadURL: ", reportsDownloadURL);
                response = restTemplate.exchange(reportsDownloadURL, HttpMethod.GET, entity, String.class);
                if (response.getStatusCodeValue() == 200) {
                    return response.getBody();
                } else {
                    return "error " + response.getStatusCodeValue();
                }
            } else {
                return "error " + response.getStatusCodeValue();
            }
        }
        return "error " + response.getStatusCodeValue();
    }
其他的,大家可以参考下面的,不再赘述。